
Everything you need to know about building a Brilliant 360 Assessment
Want to know how someone is really doing at work? Ask their colleagues. A 360 assessment gathers feedback from managers, peers, direct reports, and the individual themselves, to provide a comprehensive view of performance.
What is a 360 assessment for?
360 assessments (sometimes called 360-degree feedback) are commonly used in leadership development, performance reviews, succession planning, and team building.
They bring together feedback from across working relationships (i.e., managers, peers, direct reports, and the individual) to build a picture of how someone is perceived, and perceives themselves at work.
This approach makes the feedback:
Perspective-driven – reflecting multiple perspectives, not just one
More accurate – based on real, everyday interactions across levels in the organization
Productive – showing strengths and gaps with useful context
Balanced – reducing bias by combining different viewpoints
The result is feedback that’s easier to trust, understand, and more useful for making progress.
How to build a 360 Assessment
Now let’s look at how you set up a 360 Assessment in Brilliant Assessments.
Basic Ingredients
There are a couple of key ingredients you’ll need to get started:
Who is the subject?
What roles are going to be involved in the assessment?
What will you ask and what format do you need the questions to be in?
How many responses are needed before a report is produced, to preserve a degree of anonymity?
There are also stacks of other features you can use in your Brilliant Assessment like benchmarks, iterations, results pages and more, but for a 360 Assessment specifically, you’ll want to have an idea of those four things.
Set Up 101

360 Assessment Cohort
Once you’re in Brilliant Assessments (and you can do this on a trial account) create an assessment and set the Cohort Type to 360. A cohort groups all the responses related to a subject together, so you might want to name your cohort ‘Jane Doe’ accordingly.
At this stage, you can specify who will receive the report, how many days respondents have to complete the assessment, and the minimum responses required to generate the report.

Roles
In this view, you can also set the roles. You’ll want to add a role for each type of participant reviewing the subject, such as Manager, Peer, Direct Report, and, of course, the subject themselves (don’t forget that last one!).
Building the Questionnaire
Welcome Section
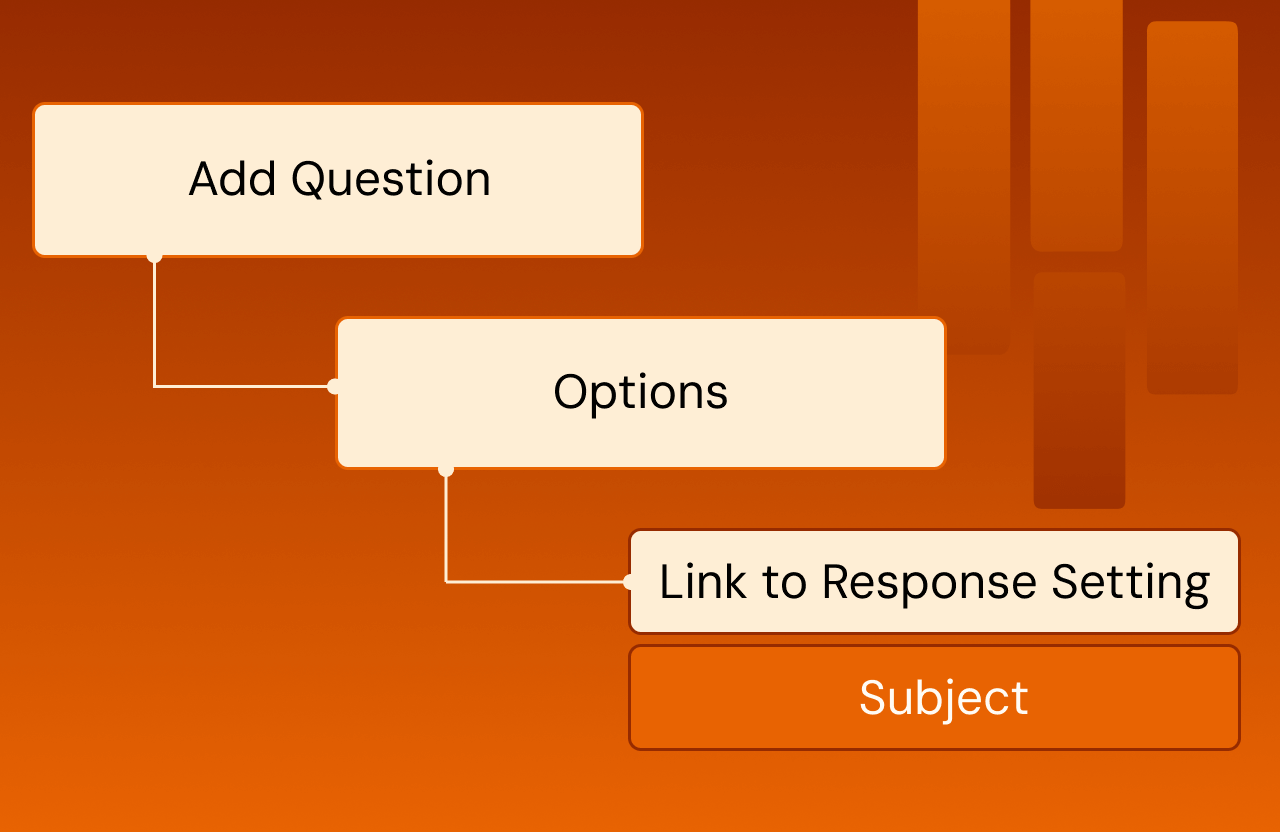
Now you’ve got your roles set up, it’s time to start building the assessment. In the welcome section, you’ll want to create a hidden question for each role, and link this to the Response Setting for Role. This will make your assessment relevant to the role and person.
You will also want to create a hidden question for the assessment subject. This will be linked to the Subject and used to add context to the questions.
Both fields will be filled automatically by the system for respondents. However, if you want to allow editing, unhide the questions.
Questions
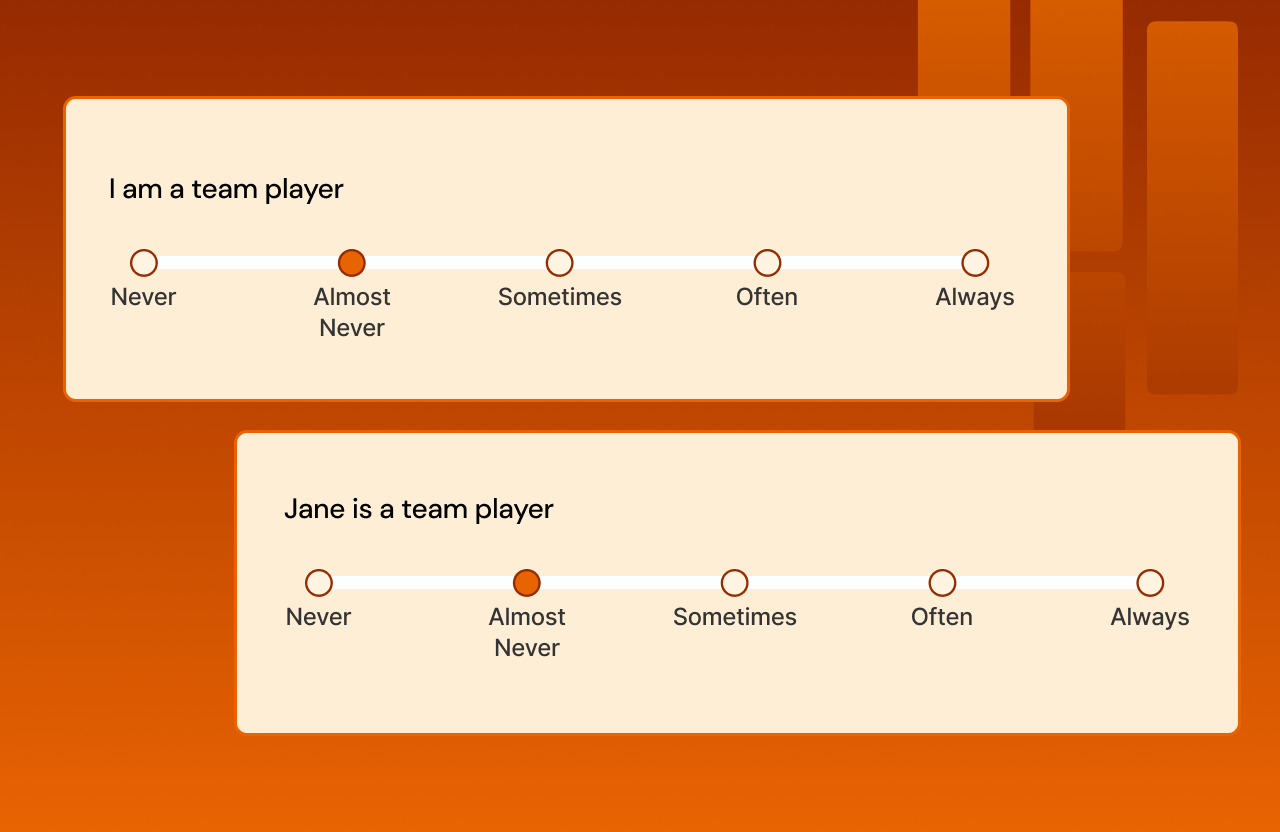
Now you’ll want to add your questions, and this is where you can add that little tweak that makes the assessment more personal to the role.
For each question, create one version that reads, for example:
I am a team player
And another that reads
{Answer Text for Subject Question} is a team player.
You can merge in the answer text for any question in the assessment as needed, which can be super helpful for personalisation and context.
Adding Conditions
Now, this is the important bit that will make each question specific to the role. You’re going to want to make the question conditional on the particular role. So the ‘I am’ tense question is only served to those with the ‘subject’ role in the assessment and all other roles get the third person question ‘Jane’ is a team player. This is controlled in the question settings and is super easy to do using AND/OR logic.
Collecting Responses

Adding Responses
As mentioned earlier, if you link your questions to the response settings, you can prefill a load of the welcome section and maintain control over the assessment experience for each role. Any of the linked questions which are set to ‘hidden’ will be prefilled with what is in the response settings.
To connect the response to the subject, add your respondents to the cohort. To invite them, you’ll want to make sure you have an invitation email set up. This is called a Welcome email and new assessments will have a templated version in them by default, but you’ll want to add your own logo and branding. This is available in ‘Emails’ in the main menu.
Once you’re ready, hit Invite Respondents and boom, the link to complete the assessment response will land in their inbox.
Building Reports
Now, you’ll probably want to set up your reports before you drop the invites to complete the assessment, but in the spirit of a chronological experience, let’s take a step back.
In your reports, there is so much you can do with a 360 assessment, and you’ll want to create this as a Cohort Report, to pool all the responses on the subject.
Popular Charting Features for 360s
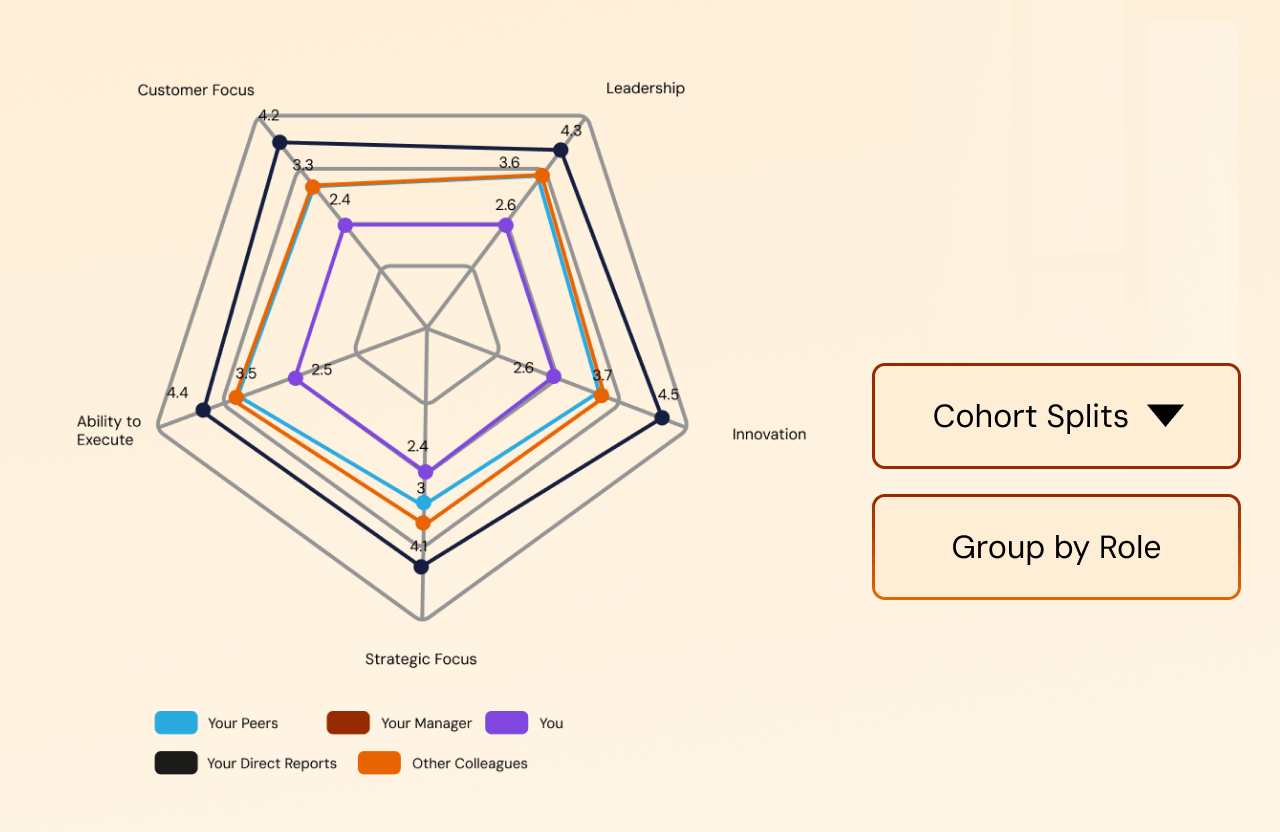
Showing a breakdown by role
To show this, set the cohort splits to ‘Group by Role’
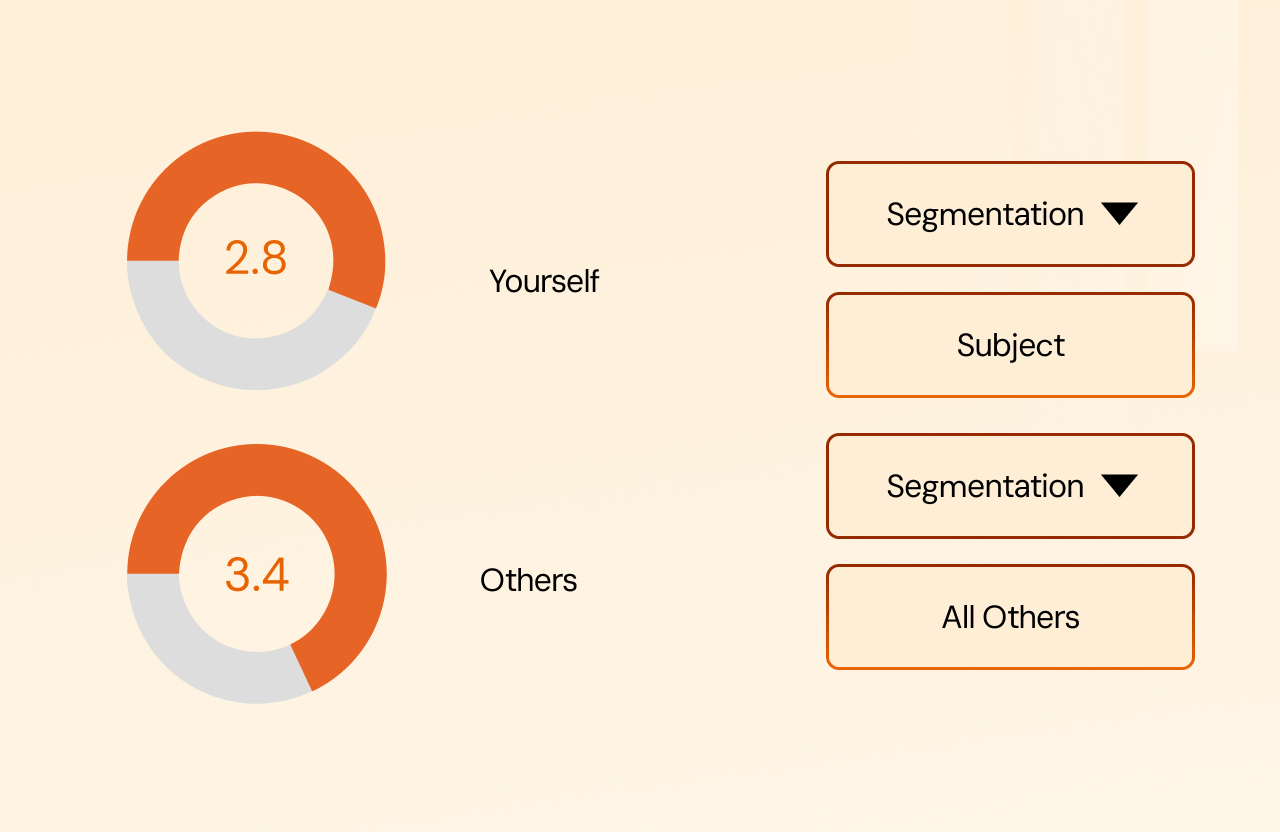
Comparing the Subject’s Answers to Other Respondents
To achieve this, create a segmentation linking all questions related to the subject, and another connecting all questions related to the other roles. Then select Show [Scores for] Segmentations.
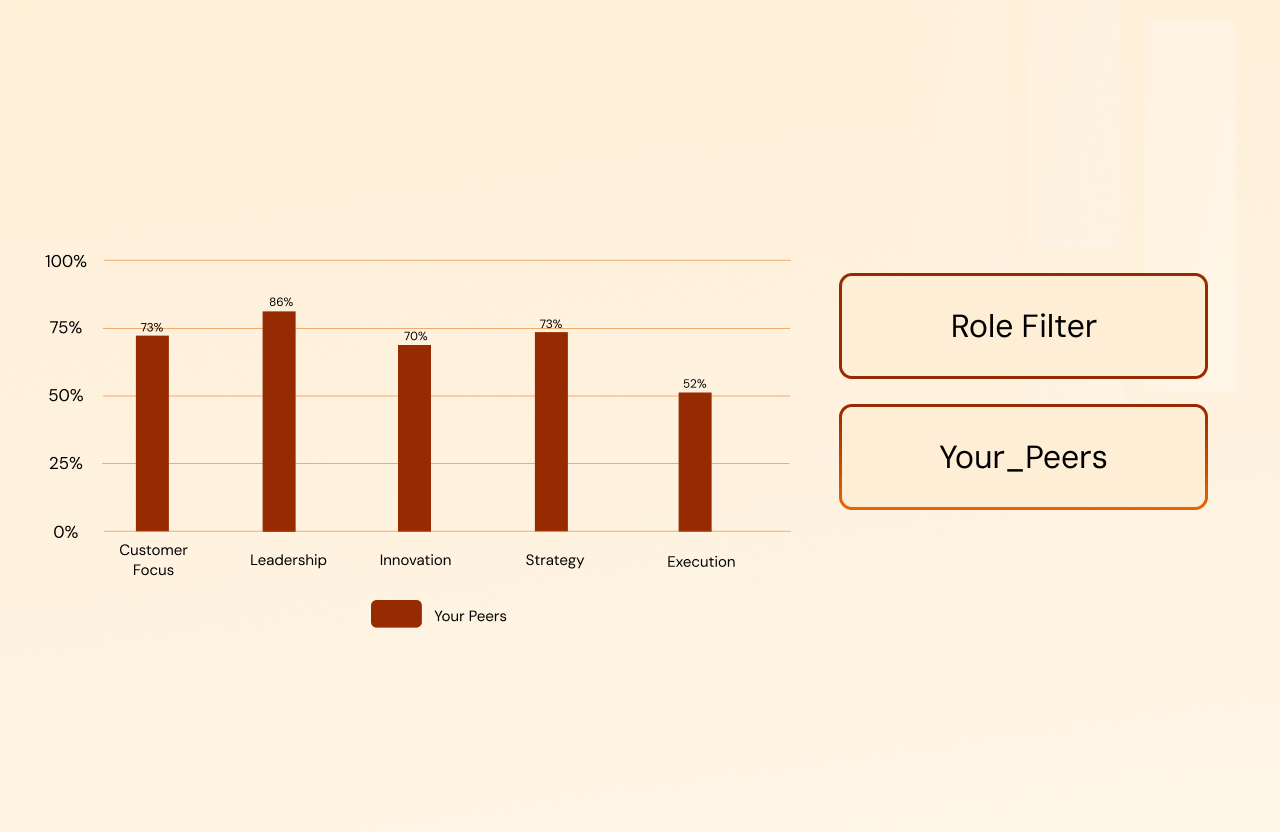
Filter Scores by Roles
To show the score that a specific assessment role gave, add the Role filter and write the role, using an underscore to separate spaces if applicable.

Compare Iterations
To show how a score has changed over time, set the Cohort Splits to Group by Iteration. This will pull all iterations with the same Cohort Subject.
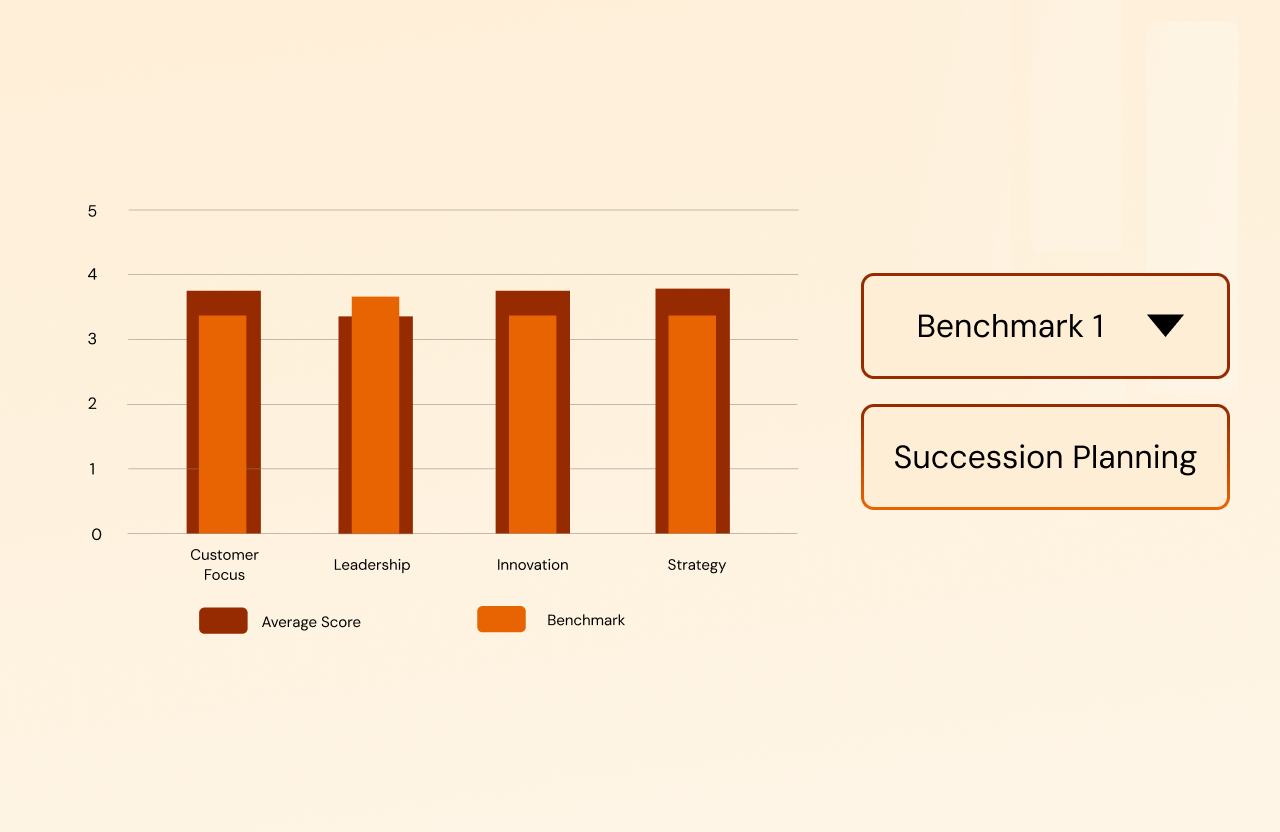
Set Benchmarks
To show a Seeded Benchmark and set a standard for achievement in a 360, add a multi-chart type and select the Benchmark To Be Used in the Merge Manager Options. You can add up to three benchmarks in a merge string.

Top and Bottom Scores
This is popular for almost every and any assessment. To show the top score in an assessment, section, subsection, segmentation or even a question, add the Top or Bottom merge string and a number to indicate the ranking (for example, Top 1 would be the top score, Top 2 would be the second highest score).

Bring it all together in a results page
All the charts and feedback you add to your feedback report can also be added to a Cohort results page. As an assessment manager, you can set this as a home page for the cohort, or if you are inviting the subject to their own portal, you can set this as a home page for the respondent upon sign-in.
To set the cohort results page, go to the Feedback section in your Assessment Settings, scroll down to Outputs, and select the Results Page for your Cohort Home Results.
Best place to start — Book a demo
This is just the tip of the iceberg of what you can do with your 360 Assessments in Brilliant Assessments, and the best way to get started is to have a demo with our team, find out the best way to approach your assessment objectives and get a bit of coaching from our support team on how to hit the ground running. You can also take the platform for a spin, for two weeks, completely for free. That’s just enough time to get set up and start testing out your responses.